In a previous post, I previewed Rubrik’s support for Amazon Elastic Compute Cloud (EC2) native protection, and it’s been rewarding seeing customers use this capability to protect their AWS workloads. With the exciting announcements recently revealed at AWS re:Invent, this is a good time to walk through some of Rubrik’s Amazon EC2 protection capabilities.
Prerequisites
First thing you’ll need is an AWS account with some Amazon EC2 instances launched and running in one or more AWS Regions. Note that these instances must be using Amazon Elastic Block Storage (EBS) volumes since Rubrik will be leveraging Amazon EBS snapshots for data protection. On the Rubrik side, you’ll need either a Rubrik instance running on-premises with network connectivity to AWS or a Rubrik Cloud Cluster with access to your AWS account.
There is also some preliminary configuration work, detailed in Rubrik documentation, that has to be completed before we can start managing native Amazon EC2 protection:
- Identify a Virtual Private Cloud (VPC) and Subnet where the transient Rubirk EC2 instance will be launched. This Rubrik instance will be used for the indexing of Amazon EBS snapshots.
- Create a Security Group that allows inbound access over TCP through ports 2002 and 7780. This Security Group will be configured for assignment to the transient Rubrik instance.
- Create an IAM user with the necessary permissions to manage Amazon EC2 protection.
- Configure Rubrik to manage your instances by using the Rubrik dashboard to add the IAM user above and the AWS Regions to be managed, as detailed in Rubrik documentation.
Managing the Lifecycle of Your Snapshots
To get started, we’ll be managing Amazon EC2 instances in us-west-1. Once these instances have been discovered, we can configure protection for those instances. While users can easily take on-demand snapshots from the Rubrik dashboard, most customers prefer to automate snapshot lifecycle management.
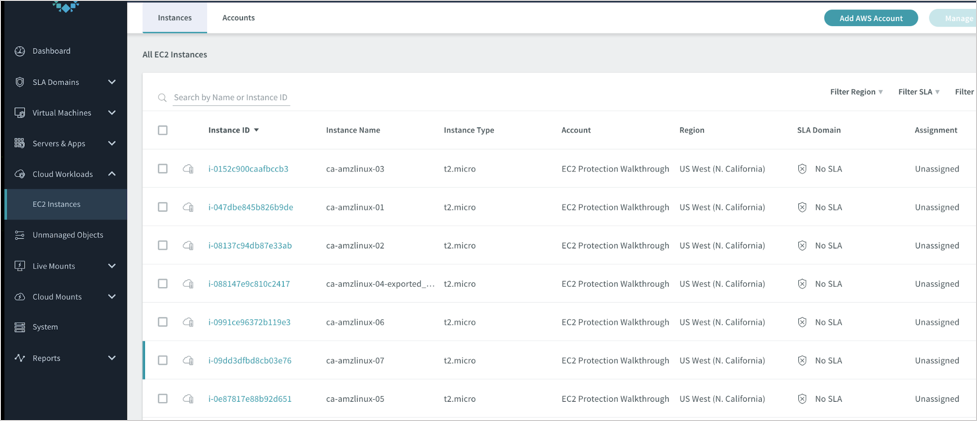
Rubrik performs lifecycle management via our SLA Domains. A Rubrik SLA Domain is essentially a policy container where users declare the protection end-state for a set of objects, in this case for your Amazon EC2 instances. Rubrik CDM automatically creates and manages the tasks required to satisfy the SLA Domain, such as the creation and deletion of Amazon EC2 snapshots in this example. Here’s how you configure a Rubrik SLA Domain:
1. Navigate to the SLA Domains section and choose Local Domains.

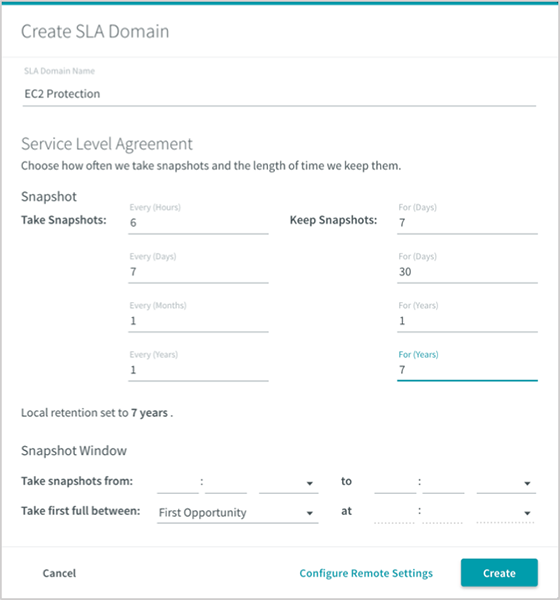
2. In the Create SLA Domain dialog box, name the SLA Doman and declare the desired frequency and retention of your snapshots, then click Create. For this walkthrough, we will call our SLA Domain EC2 Protection.
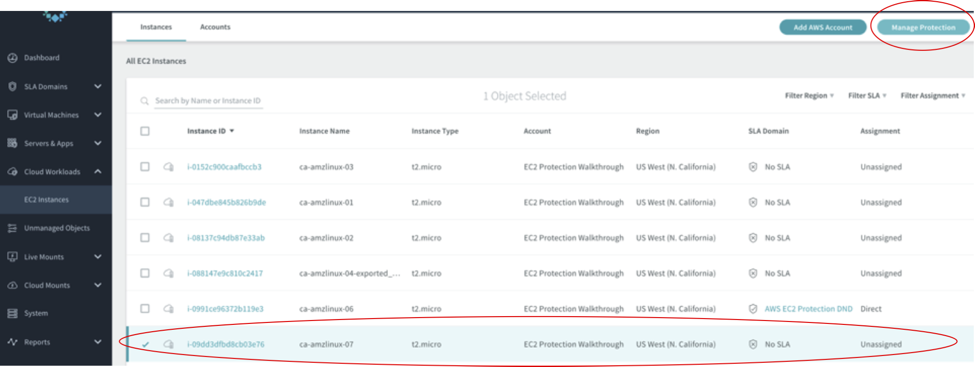
3. We can apply our new SLA Domain to a single instance or to a group of instances. For this walkthrough, we will apply our new SLA Domain to the EC2 instance ca-amzlinux-07. To do that, go back to the previous Cloud Workloads section and check the box next to ca-amzlinux-07. Click on the Manage Protection button on the upper right-hand corner of the dashboard.
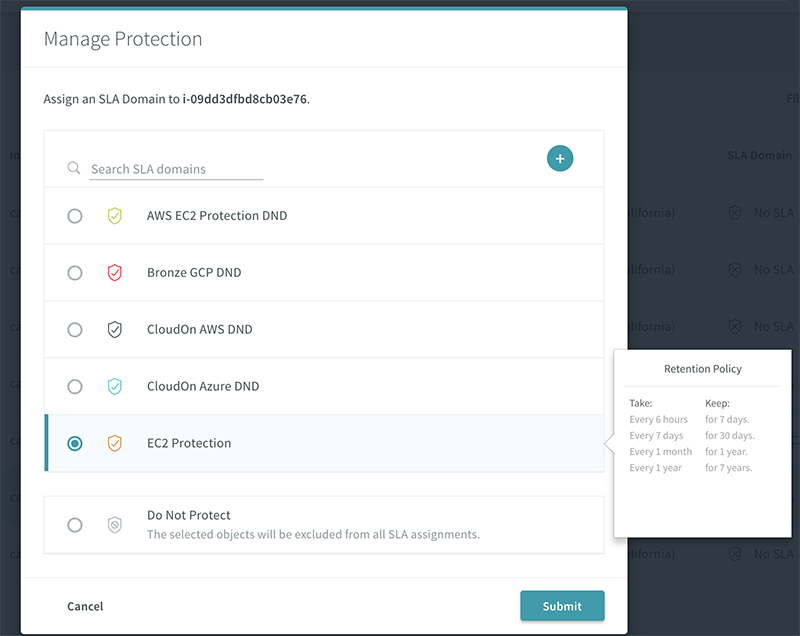
4. In the Manage Protection dialog box, choose the new EC2 Protection SLA Domain and hit Submit.
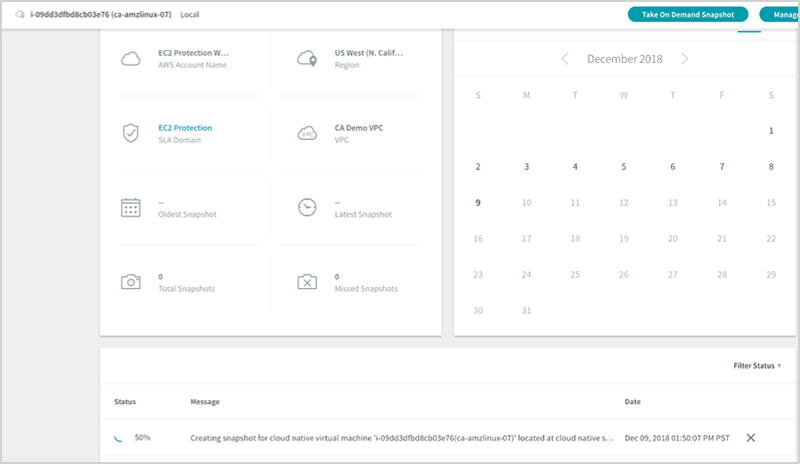
5. Now click on ca-amzlinux-07 in the Cloud Workloads section to view a summary of that instance. After a few minutes, you will see, in the Status section, the first snapshot being initiated.
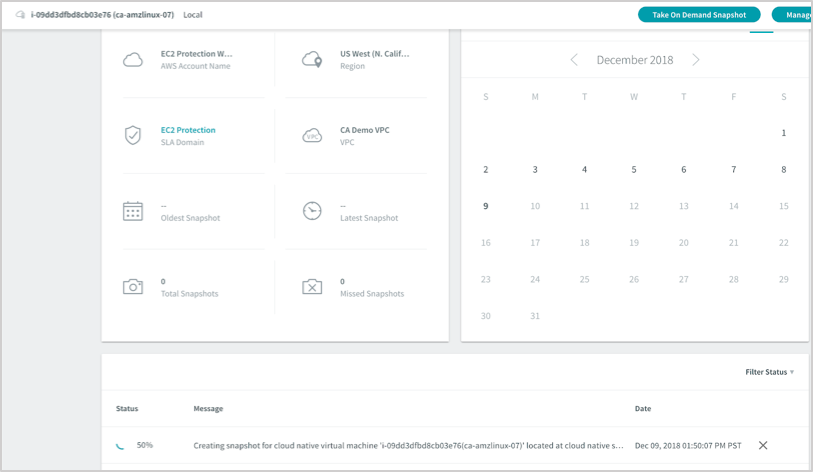
6. In your AWS EC2 Console, you will see that a new Amazon Machine Image (AMI) has been or is being created. Go to the Snapshots section in the same console, and you will also see a snapshot created or in the process of being created that is associated with the new AMI.

Rubrik will continue to manage the lifecycle of these AMIs and snapshots according to the policies we created earlier.
It’s Not About the Backups But the Restores
Backups are great, but restores are where the rubber meets the road. It doesn’t matter how elegant your backup solution if you can’t restore simply and quickly. Rubrik automates the steps required to do both volume-level and file-level restores while abstracting all the complexity from users.
Instance (Volume)-Level Restore
We’ll start by walking through how to do an in-place restore of an EC2 instance, and then we’ll perform a file-level restore.
1. Refresh the dashboard view for your EC2 instance (ca-amzlinux-07 in this example), and you should see a green dot next to the date when it was added to a new SLA Domain. Clicking that date allows you to see all snapshots that have been taken that day.
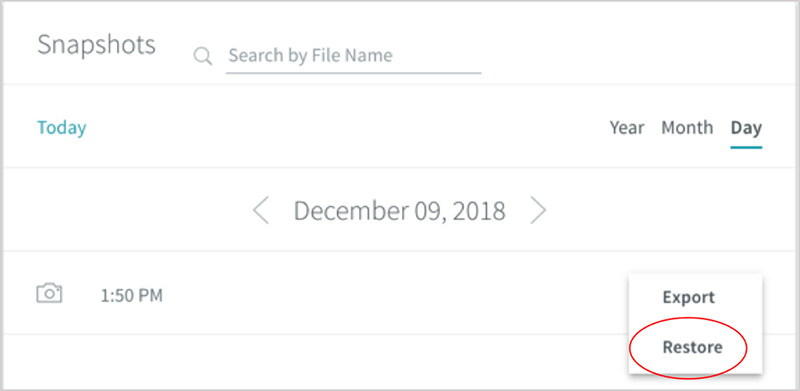
2. Click on the menu next to the snapshot we are restoring and choose Restore.
Go ahead and confirm that you want to perform the in-place restore by clicking on the Restore button. In the Status section, you will see that Rubrik has started a restore task.
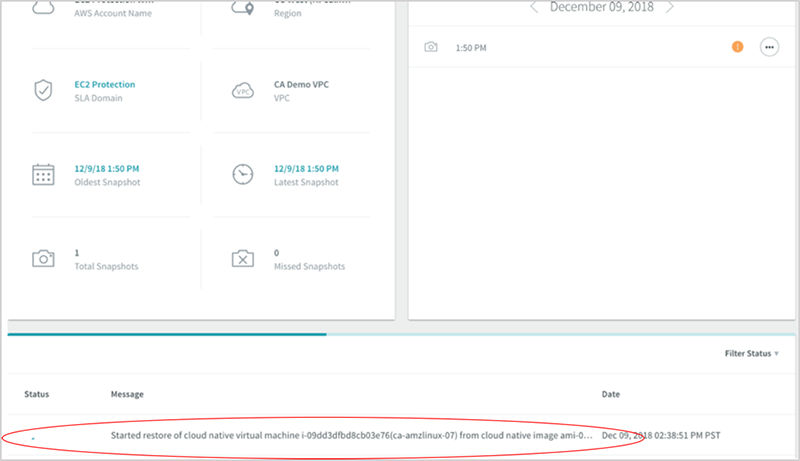
If you go to your AWS console, you will see Rubrik initiate a stop instance task in preparation for the restore.

A new EBS volume will be automatically created and attached to the instance, and the old volume will be detached. The old volume will not be deleted but left unattached and shown as available. Finally, the instance will be automatically restarted.

File-Level Restore
File-level restores from an Amazon EBS snapshot is not a simple task. What if you have multiple snapshots for an EC2 instance and don’t know which snapshots have a copy of that file? Typically, users have to mount each snapshot and, by trial and error, search to see if they can locate the correct file to restore. This is dramatically simplified in Rubrik because of our ability to index the contents of every snapshot.
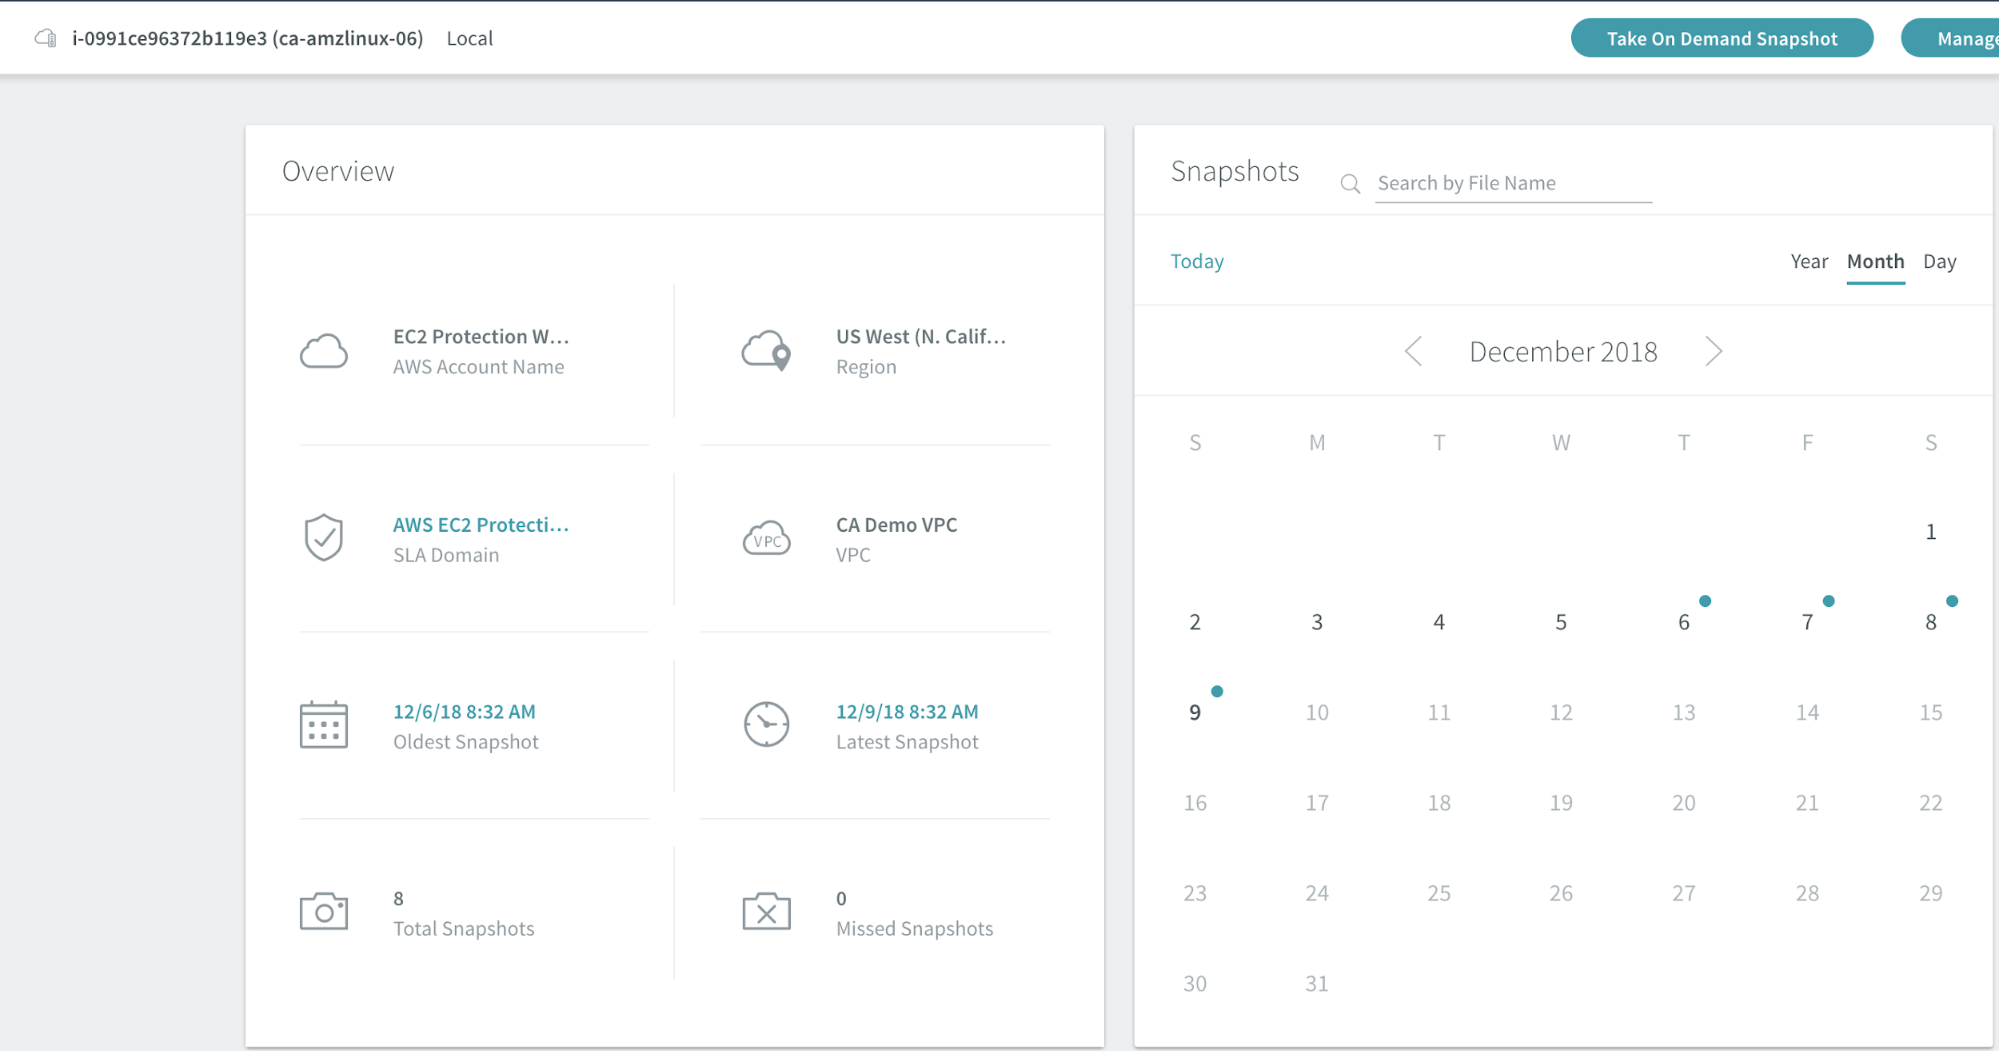
1. For this walkthrough, we are going to use an instance, ca-amzlinux-06, that I’ve been protecting for several days. Go back to the Cloud Workloads section and drill down into that EC2 instance. You will see that it has been protected for several days, as indicated by the green dots in the default calendar view.
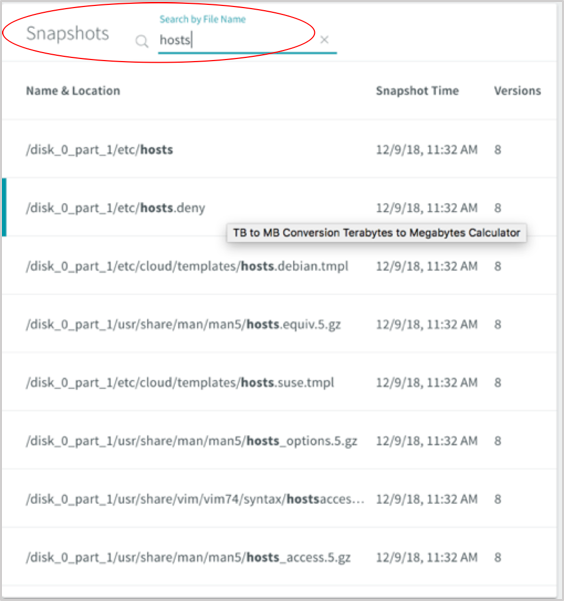
2. We are going to download a file called “hosts” for restore. To find every instance of that file across all our available snapshots for ca-amzlinux-06, type hosts in the search bar. In a few seconds, we will be shown every file that pattern matches our search.
3. Click on any of the search results and you will be presented with a dialog box, listing every copy of that file across all the available snapshots for ca-amzlinux-06. Choose the copy you want to restore and click on the menu button next to it. You will be given the option to download the file.
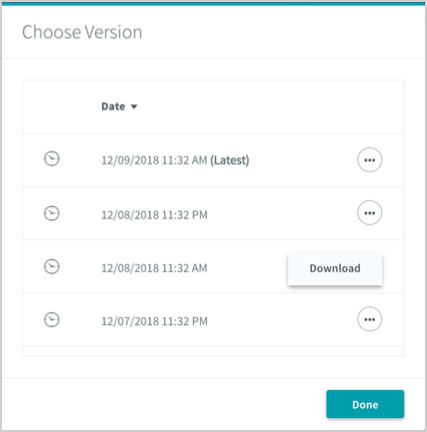
This will initiate a task, which you can monitor in the Status section, to create a temporary volume from that snapshot, mount the volume, and retrieve the file for download. You can then restore the file or transfer it to another location.
This brief walkthrough demonstrates the power of using Rubrik CDM to manage the protection of your Amazon EC2 instances. As always, you can reach out to me on Twitter with any comments or questions. I am @kenhuiny and my Twitter DM is alway open.
