It might seem like an odd statement, but sandboxes are a great place to plant the seeds of innovation.
I’m not talking about digging around the playground with a shovel and pail—I’m talking about building, experimenting, rebuilding, and restarting software product design and strategy.
A sandbox is an environment other than your production environment where you can create copies of your data and use them for development, testing, and training. This allows you to play with new ideas without compromising your live data and applications. With the correct data and tools to easily move the data, administrators or developers can use a sandbox to add new features or enhance your existing environment.
But getting the sandbox up and running can be a struggle without the right tools. Salesforce offers numerous opportunities for innovation within a sandbox environment. However it requires manual data tasks such as exporting, filtering, and fixing relationships (known as sandbox seeding) that can be time-consuming and tedious.
Adding Rubrik to the mix allows Salesforce developers and admins to transform the way they manage sandbox data, making testing and development an absolute breeze! With Rubirk, you no longer need to seed your sandbox manually. Here’s how.
Rubrik in the Salesforce Sandbox
Seeding a Salesforce sandbox isn’t just about moving data; it’s about moving the correct data efficiently and accurately. There are three major challenges that arise in this process:
Administrators must manually ensure data integrity, maintaining parent-child relationships. This can be both time-consuming and error-prone.
Admins frequently run into storage limits if they aren’t able to do size analysis before seeding. This often means having to restart the data seeding process.
Setting up a sandbox once can be difficult; doing so consistently and efficiently across multiple environments is even more challenging.
For any testing or feature development, you always want data that mimics your production data, which means not only the parent data but also the child data. It is essential to maintain those relationships.
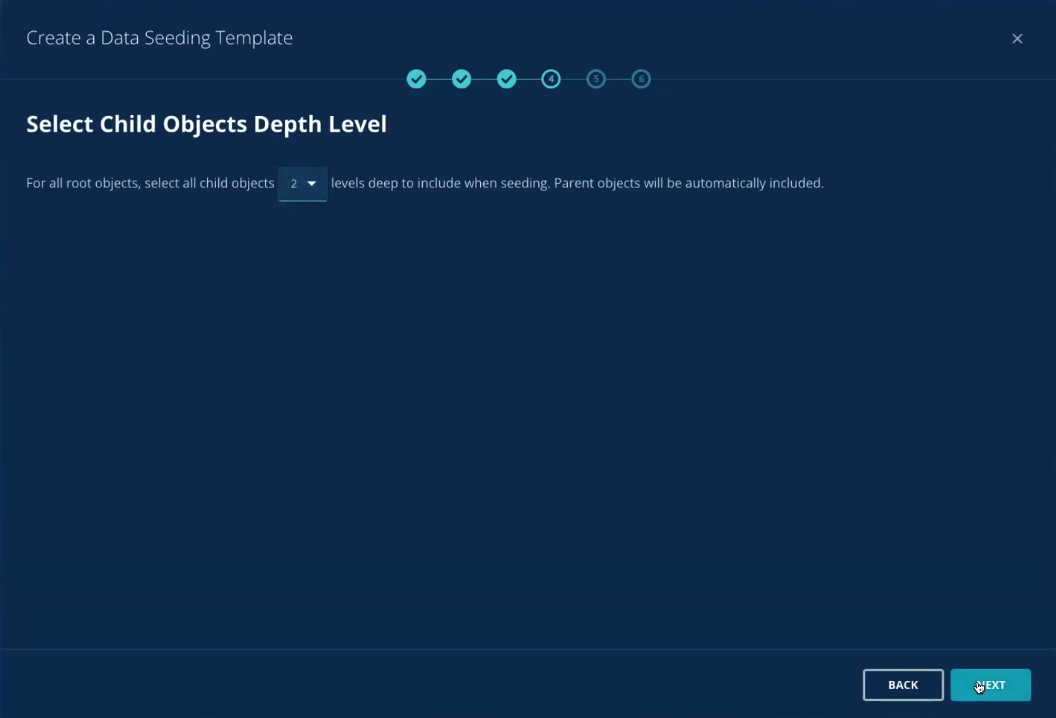
With Rubrik, you don’t have to painstakingly reconstruct parent-child relationships—they are kept intact for up to 10 levels, sparing you the hassle of reconstructing them. You can also seamlessly seed into various sandbox types, such as developer or developer pro, allowing you to experiment and develop without constraints. Rubrik also offers metadata seeding, a unique feature that distinguishes the platform for its competitors.

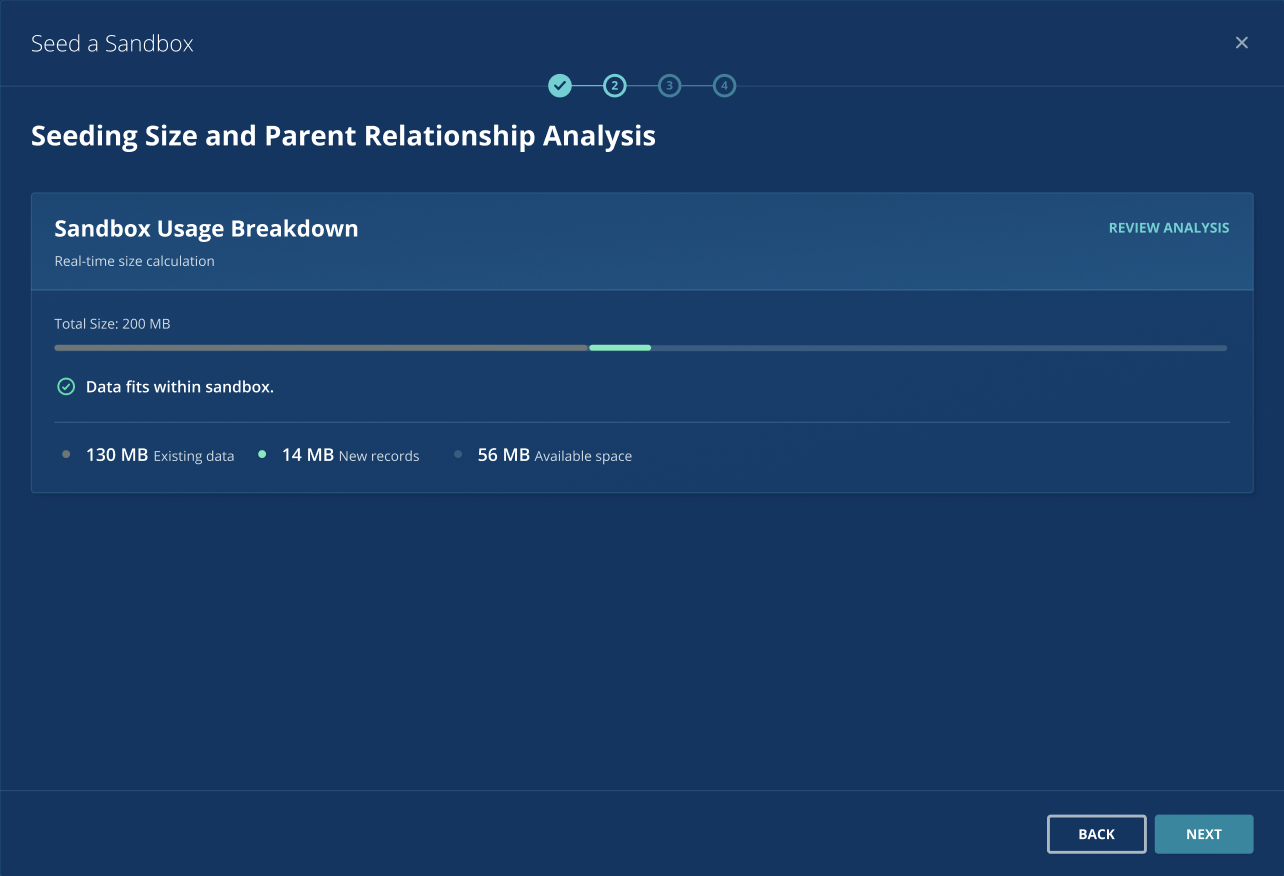
Rubrik also analyzes your data in advance, ensuring it fits within the sandbox's size constraints. By proactively analyzing your sandbox capacity before seeding data, Rubrik can establish sandbox usage breakdowns and allow customers to catch potential sizing issues before a problem occurs. Being able to adjust sandbox capacity requirements early in the process leads to reduced trial and error, fewer failures, and more efficient utilization of sandbox resources.

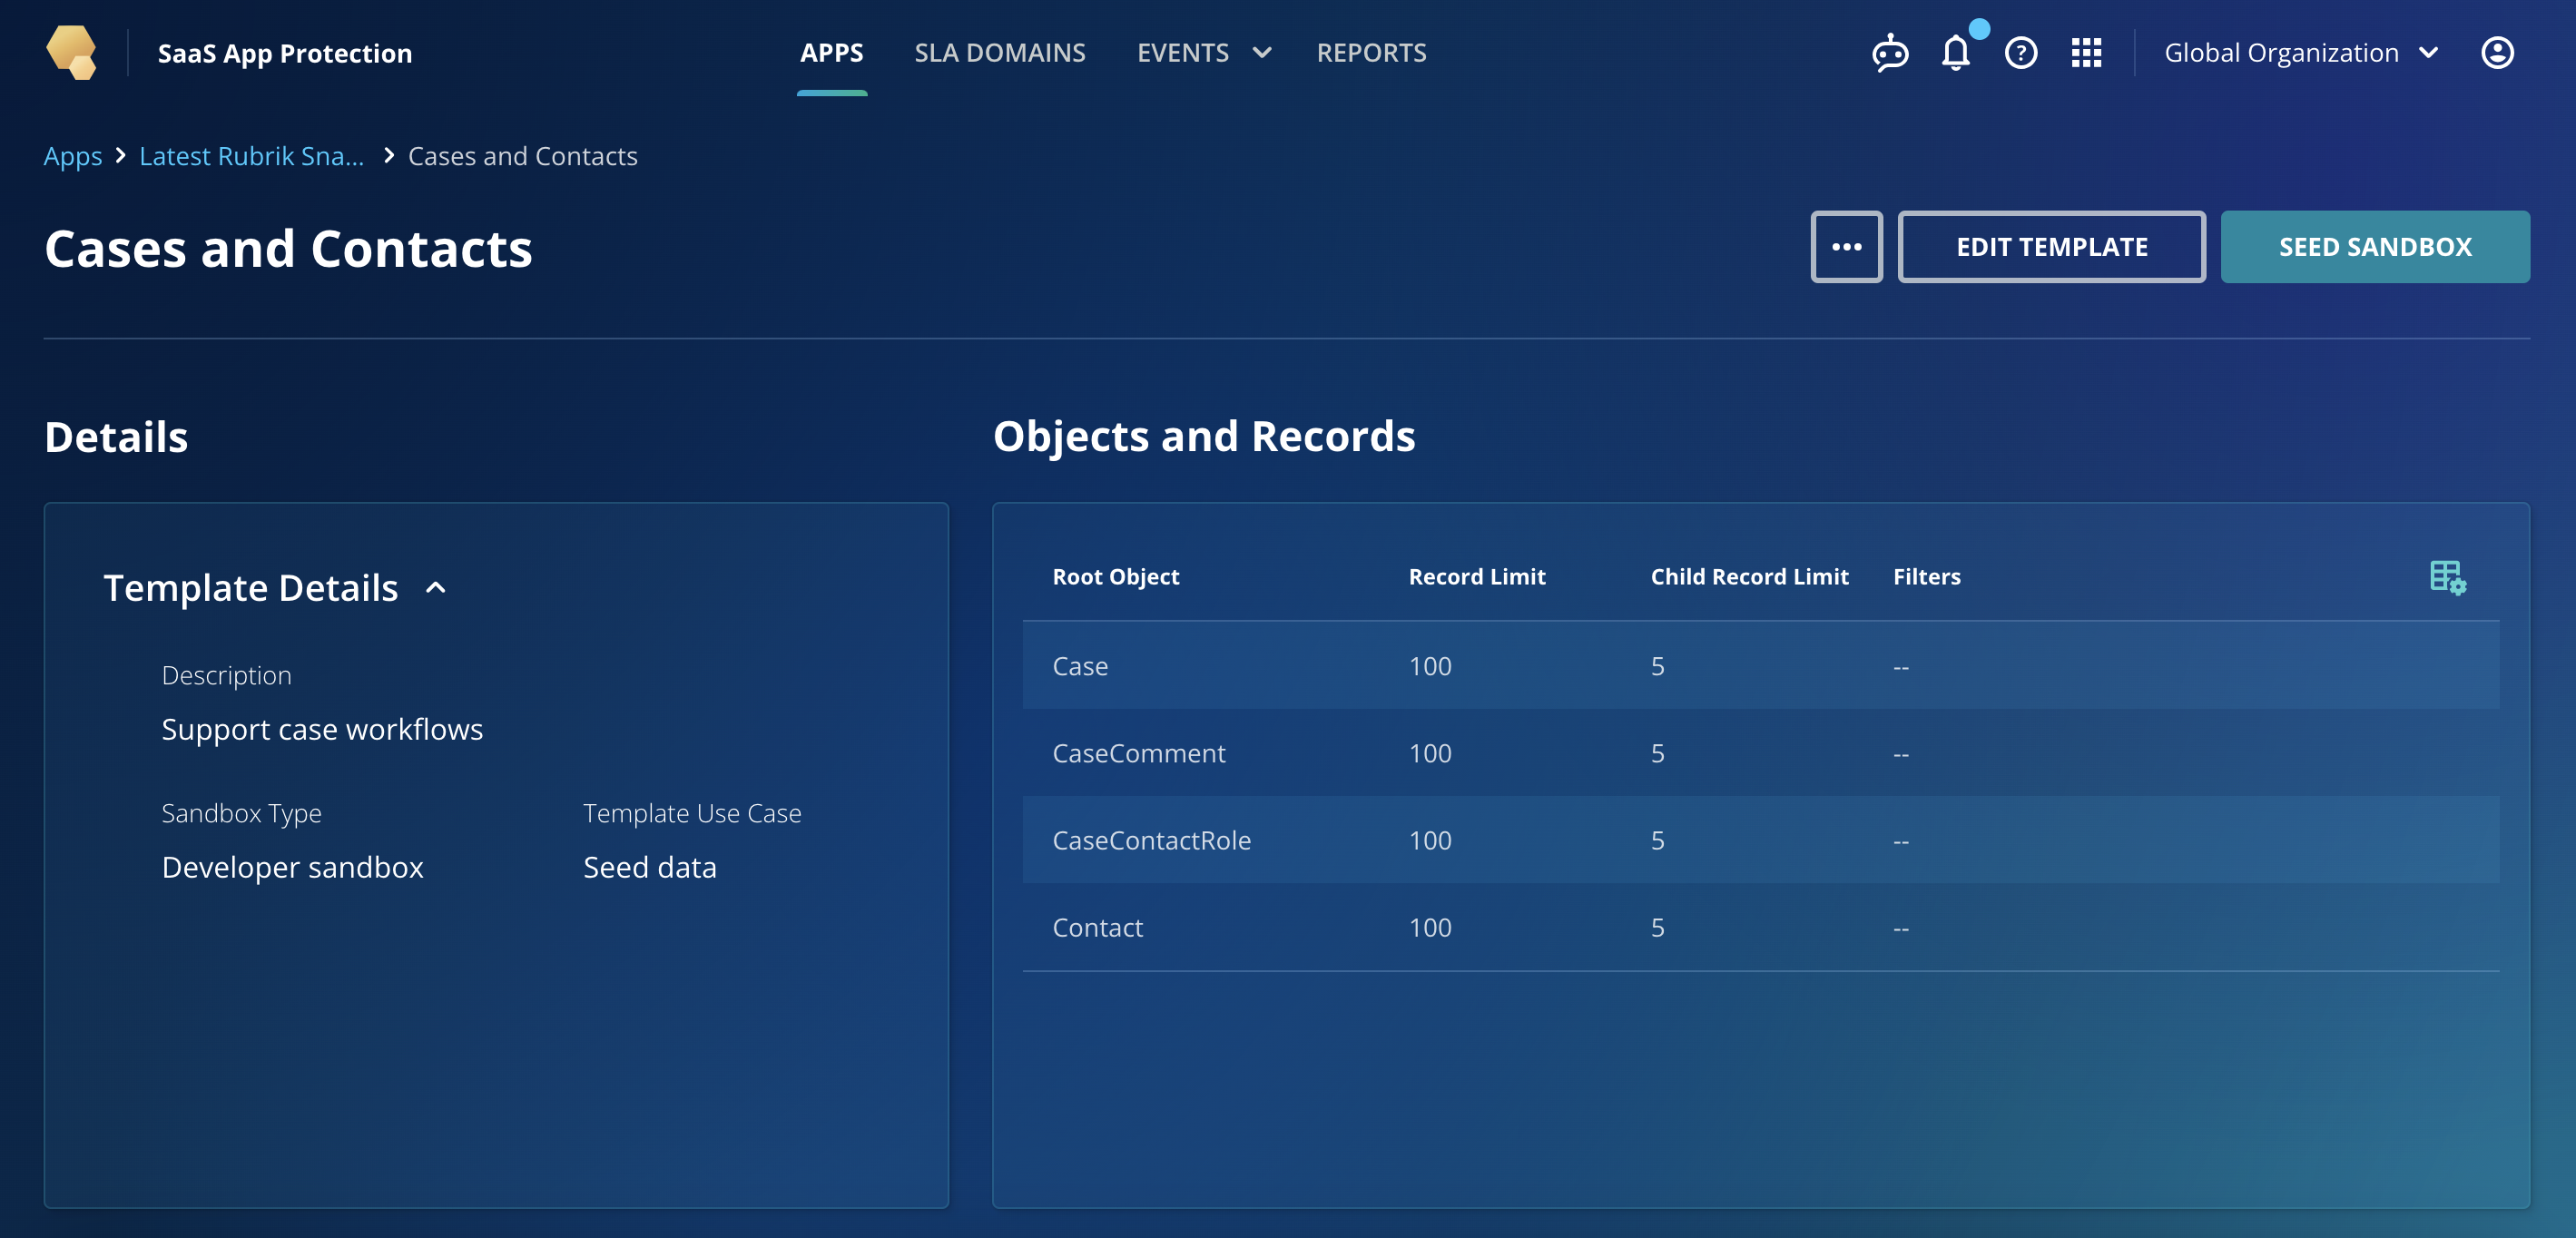
Rubrik has prebuilt templates tailored to your team's unique needs by pre-defining the sandbox type, root objects, relationship level, records, and limits. And that's it! With these templates, there's no need to go through the manual setup process for every sandbox. Just reuse these prebuilt templates that are as unique as your team. By automating and scaling this process, you'll be able to easily refresh sandboxes with pre-approved data, saving both time and effort while accelerating your development cycles. More time to play in the sandbox!

Since Rubrik is a SaaS solution, our product design and development teams have a deep understanding of the effort it takes to seed your Salesforce data efficiently. We boiled that down into four steps to get your Salesforce sandbox up and running.
Step 1: Create a Template: Remember, templates automate the sandbox configuration process. You create a seeding template by predefining:
Sandbox type: Select Dev or Dev Pro Sandbox types.
Objects: Pick the right root objects, child objects, and add object relationship levels (up to 10 deep).
Records and limits: Set record limits for objects and use filters that match your record data criteria.
Step 2: Use the template: Initiate the seeding flow by selecting one of the existing templates from the existing list.
Step 3: Select data origin snapshot and sandbox destination: Select the backup snapshot you want to use to seed data from the destination sandbox you want to fill.
Step 4: Analyze Your Seed Data: Does your seeding data fit in the destination sandbox? Double check the data fits before kicking off the seeding process.
With the data now in place, your developers and admins get to enjoy a playground for product creativity and innovation.
With Rubrik as your trusted partner, the innovation journey becomes an easy ride! Say goodbye to data-seeding headaches and hello to effortless sandbox management. To learn more and get hands-on experience, visit Rubrik’s Salesforce Sandbox Seeding Hands-On lab!
